Main menu
User login
Syndicate
You are here
Lomo Script with Old Style Colors
This script simulates the Lomo effect.
Copy it into the scripts folder from GIMP, you will find it then under Filters -> Light and Shadow -> Lomo.
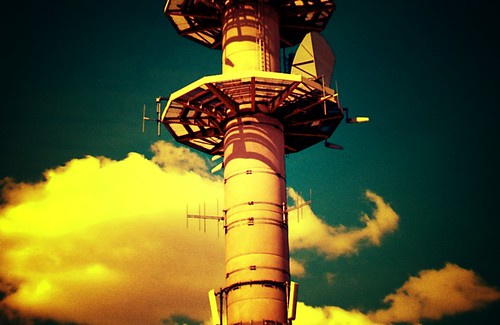
The original from Francois Le Lay can be downloaded here. The idea of C41 colors comes from here. I added sharpness, repaired the double vignetting problem and added some nice colors, especially the beautiful green sky effect from crossprocessed pictures. Examples can be found here.
Attention, results may make happy. :D

http://www.flickr.com/photos/28653536@N07/2879107018/

http://www.flickr.com/photos/28653536@N07/2891297169/
http://www.flickr.com/photos/28653536@N07/4501441798/
If you like it, hug someone.
Update: I refreshed the colors and added another vignette, but this is black and can be moved and resized. The result should be made grainy with my other script, then it looks more realistic.
Update2: The overlayed vignettes are moving now with the black vignette. That means all vignettes have the same center.
Update3: I added a slight lens distortion to simulate the wide angle lens of the Lomo LC-A. And if you own the grain script already, you can uncomment line 285 of this script to get a grainy black vignette automatically. Example here.
Update4: New color "Autumn" to simulate this. To include vignette graininess, uncomment line 314. Result here and very impressive here.
Update5: I mixed the angle distortion up, now it bends to the right direction. And the source code became prettier thanks to Dr. Scheme.
Update6: I added optional motion blur to simulate 'bad' lenses, see here.
Update7: Two new colors Movie and Vintage. Also more decent sharpness with layer mask. And I included the grain for the black vignette, so you don't have to do this. Examples here and here.
Update8: New color Xpro LAB from this book. Example here.
Update9: Possibility to inverse the A and B dimensions of the LAB color space. Example here.
Update10: Fixed the b/w problem. Added a new color option Light Blue from this role model. Example here.
I also attached the colors I use. Extract and put them into the curves folder of GIMP.
Update11: Lens distortion is adjustable now, the default is less extreme.
Update12: New color Redscale from here. Example here. The Light Blue color now has a less violet tinge.
Update13: Extensive internal fixes (eg. motion blur fixed). New option grain and gauss blur. Also sharpness is done via smart sharpen from eg and not overlay.
Update14: Sharpness layer is better on top.
Update15: Sharpness one down, grain deactivated while sharpening.
Update16: Redscale is now closer to the physical approach. Example:
http://www.flickr.com/photos/28653536@N07/4501441798/
Update17: Movie color option reworked, three new B/W tones: Retro, Paynes and Sepia. Example:
http://www.flickr.com/photos/28653536@N07/4540513605/
Update18: Added batch version, run it with
gimp -i -b '(elsamuko-lomo-batch "picture.jpg" 1.5 10 10 0.8 5 1 3 128 0 FALSE FALSE TRUE FALSE 0 0 115)' -b '(gimp-quit 0)'
or for more than one picture
gimp -i -b '(elsamuko-lomo-batch "*.jpg" 1.5 10 10 0.8 5 1 3 128 0 FALSE FALSE TRUE FALSE 0 0 115)' -b '(gimp-quit 0)'
Be careful, the batch script overwrites the original image. More info here:
http://www.gimp.org/tutorials/Basic_Batch/
Update19: Reduced vignette banding with the spread tool.
For all scripts together, go here:
http://sites.google.com/site/elsamuko/gimp
- Log in to post comments
Comments
These are neat GIMP tricks
These are neat GIMP tricks mate. I work as a photographer and this scripts would really come in handy! Thank you for sharing your knowledge with us. Kudos to GIMP and elsamuko!
Rom of ABP - http://www.amandabarkerphoto.ca
Thank you!
I'd been reading a tutorial on the lomo effect, and I thought, "Oh, there's got to be a simpler way!" Sure enough, there is...drop the script in the folder. Excellent work; thank you for sharing this.
Batch not working
Hi elsamuko,
I am VERY new to photography. I didn't know where to start on postprocessing because even if I know the basics of how to edit photos in GIMP, I still did not have a certain look to go for so I would end up just editing with a mishmash of whatever I could think of. It did not look pretty.
Until I saw this plugin!!! The warning is accurate: It really makes happy. hahaha
But when I use your batch plugin with this command, it does not work:
C:\Documents and Settings\user\My Documents\My Pictures\test>gimp-consol
e-2.6 -i -b '(elsamuko-lomo-batch "*.jpg" 1.5 10 10 0.8 5 1 3 128 2 FALSE FALSE
TRUE FALSE 0 0 115)' -b '(gimp-quit 0)'
GIMP-Error: Opening 'C:\Documents and Settings\user\My Documents\My Pict
ures\test\*.jpg' failed: Could not open 'C:\Documents and Settings\lemuel.dulfo\
My Documents\My Pictures\test\*.jpg' for reading: Invalid argument
Then there's a host of other errors, because it treats 1.5, 10, etc as filenames. :(
Windows command line
Windows command line interface does not support hard quoting using apostrophes. In your command line, try substituting double-quotes (") for the apostrophes and a backslash+double-quote (\") for each of the double quotes.
thanks, but new problem here
Thanks for the fast response! :) I'll try that on my WinXP work PC tomorrow and update the results here. :D ALTHOUGH, I am yet to try using gimp-2.6 only and not gimp-console. I'll have to try it too. :)
Heres a new one...
At the moment I'm on my 32bit Win7 laptop and I get a different error, this time it's about just loading the script. :(
It says the following:
Error while loading C:\Program Files\GIMP-2.0\share\gimp\2.0\scripts\elsamuko-lomo.scm:
Error: eval: unbound variable: <?xml
I thought that it was just an unclosed xml tag so I opened the scm file and did not find xml anywhere. This is quite weird, I was able to use the Fake-HDR plugin with no complications.
Thanks much. :)
-EDIT-
UPDATE:
It seems to be working fine now. Your first suggestion was spot on! Thank you so much! The double quotes were perfect. Also, I should not have been using the gimp-console version. *facepalm*
My second problem on my laptop was solved by simply reinstalling gimp. Apparently gimp isn't natively supported on windows. I had to remove my install and get the 2.6.10 instead of my previous 2.6.11. I have also installed Ubuntu on a VBox just in case anything goes wrong in my Windows gimp. heh
Thank you for your help! And thanks to el samuko for giving me direction. :)
fresh meat!
good day, i am very new to GIMP and very excited about this script. could someone be so kind to give me semi detailed instructions on how to download and use this script on a MAC. when i download and open it its a jumbled mess of text. and i am confused with this new setup. so please help it would be greatly appreciated.
p.s. i have previously read the other comments which have confused me more. :[
Scripts in Mac
http://registry.gimp.org/node/9129#comment-711
http://www.gimptalk.com/forum/adding-scripts-to-gimp-using-a-mac-easy-10...
Where do I keep the curves
Where do I keep the curves files in the second zip?
Curves Folder
Windows: %userprofile%\.gimp-2.6\curves\
Mac&Linux: ~/.gimp-2.6/curves
Amazing
Great script!!
Pages