Main menu
User login
Syndicate
You are here
Free-Form-Bokeh
This script consists of 2 separate plug-ins, free-form-semi-auto-bokeh and free-
form-auto-bokeh.
Both allow you to simulate the bokeh-effect (the out of focus effect which causes
point-like light-sources to appear as disks).
The "free-form" means the user must determine the size and the shape of the bokeh.
This is done by creating a selection before running either plug-in.
This selection can be placed anywhere on the image.
This means you can simulate a partially closed aperture with for instance a selection
in the shape of a pentagon.
You can also simulate a lens with a lens-cap on, from which a particular shape is cut out.
The bokeh-effect is produced on a separate, transparent layer set to screen-mode
directly above the active layer. This layer is named “Bokeh” followed by the used parameters.
The active layer can be anywhere in the layer-stack and must contain the image on which you want the plug-in to work on.
The colours of the bokeh's are taken from the image on the active layer.
Both plug-ins require the user to define the ring-thickness. This refers to a subtle ring on the inside of each bokeh, simulating what appears in real bokeh's.
Both plug-ins give you the option of inserting a blurred layer between the image and
the bokeh-layer, the original layer will be left intact and is, on exit, set to the active layer.
There is also an option to change the lightness and the saturation of the produced
bokeh-layer.
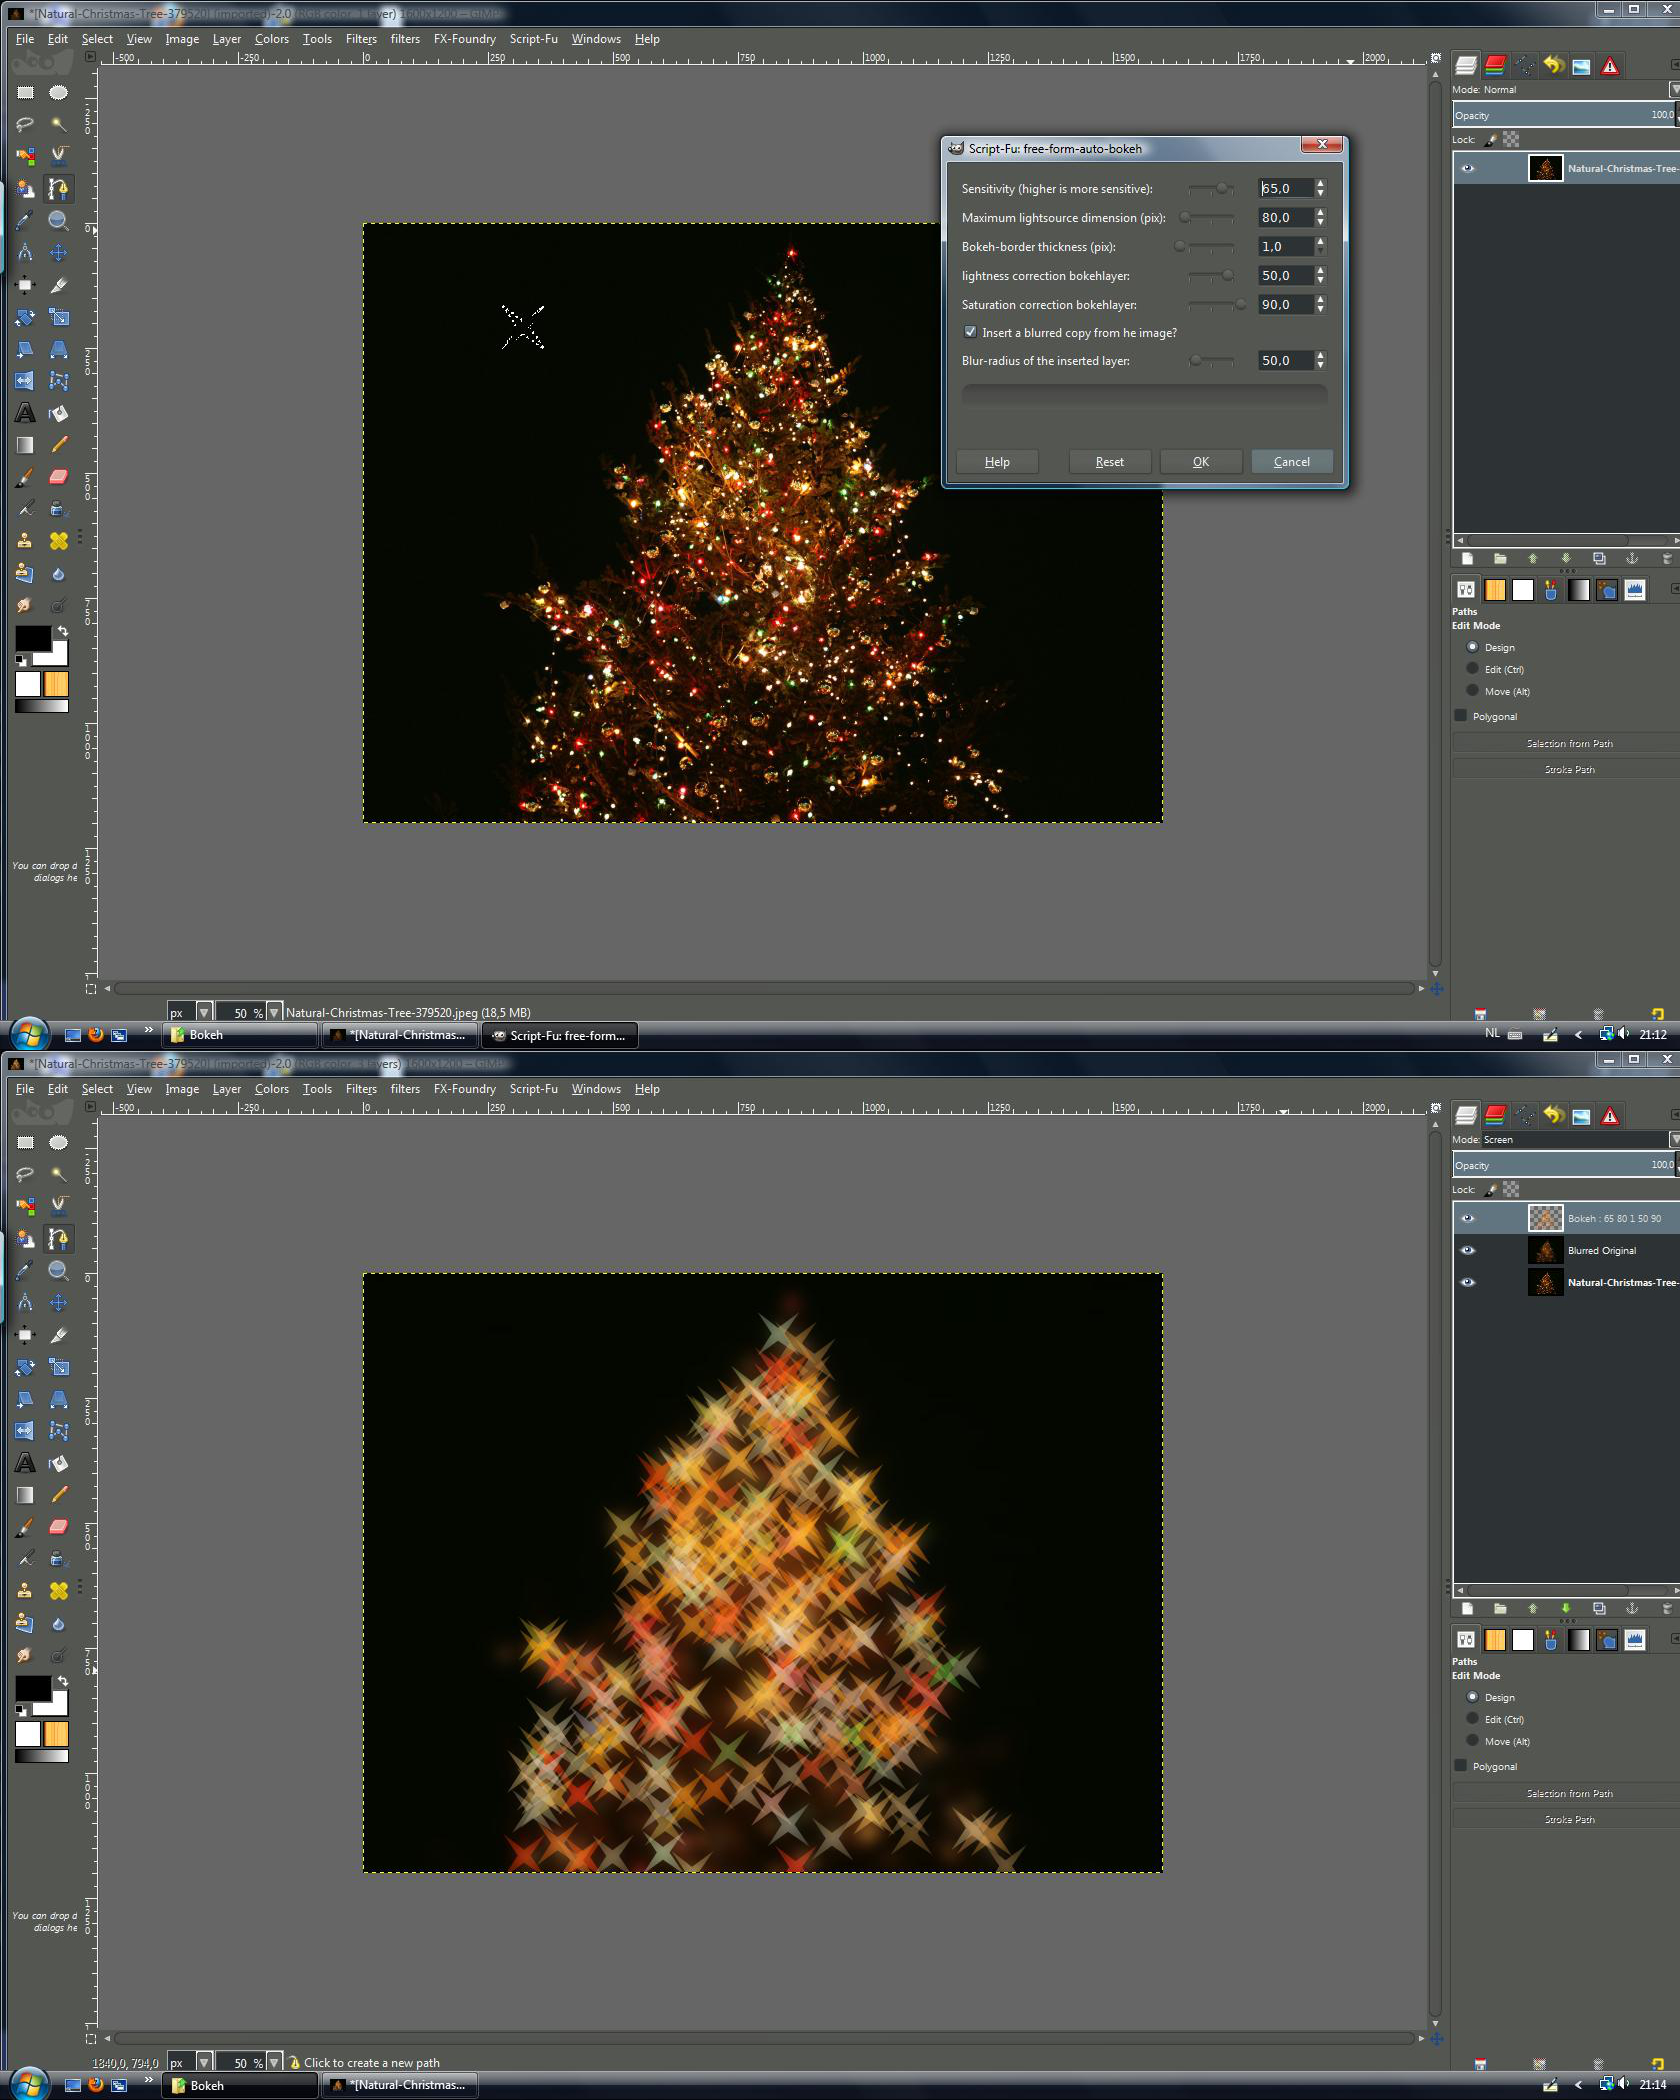
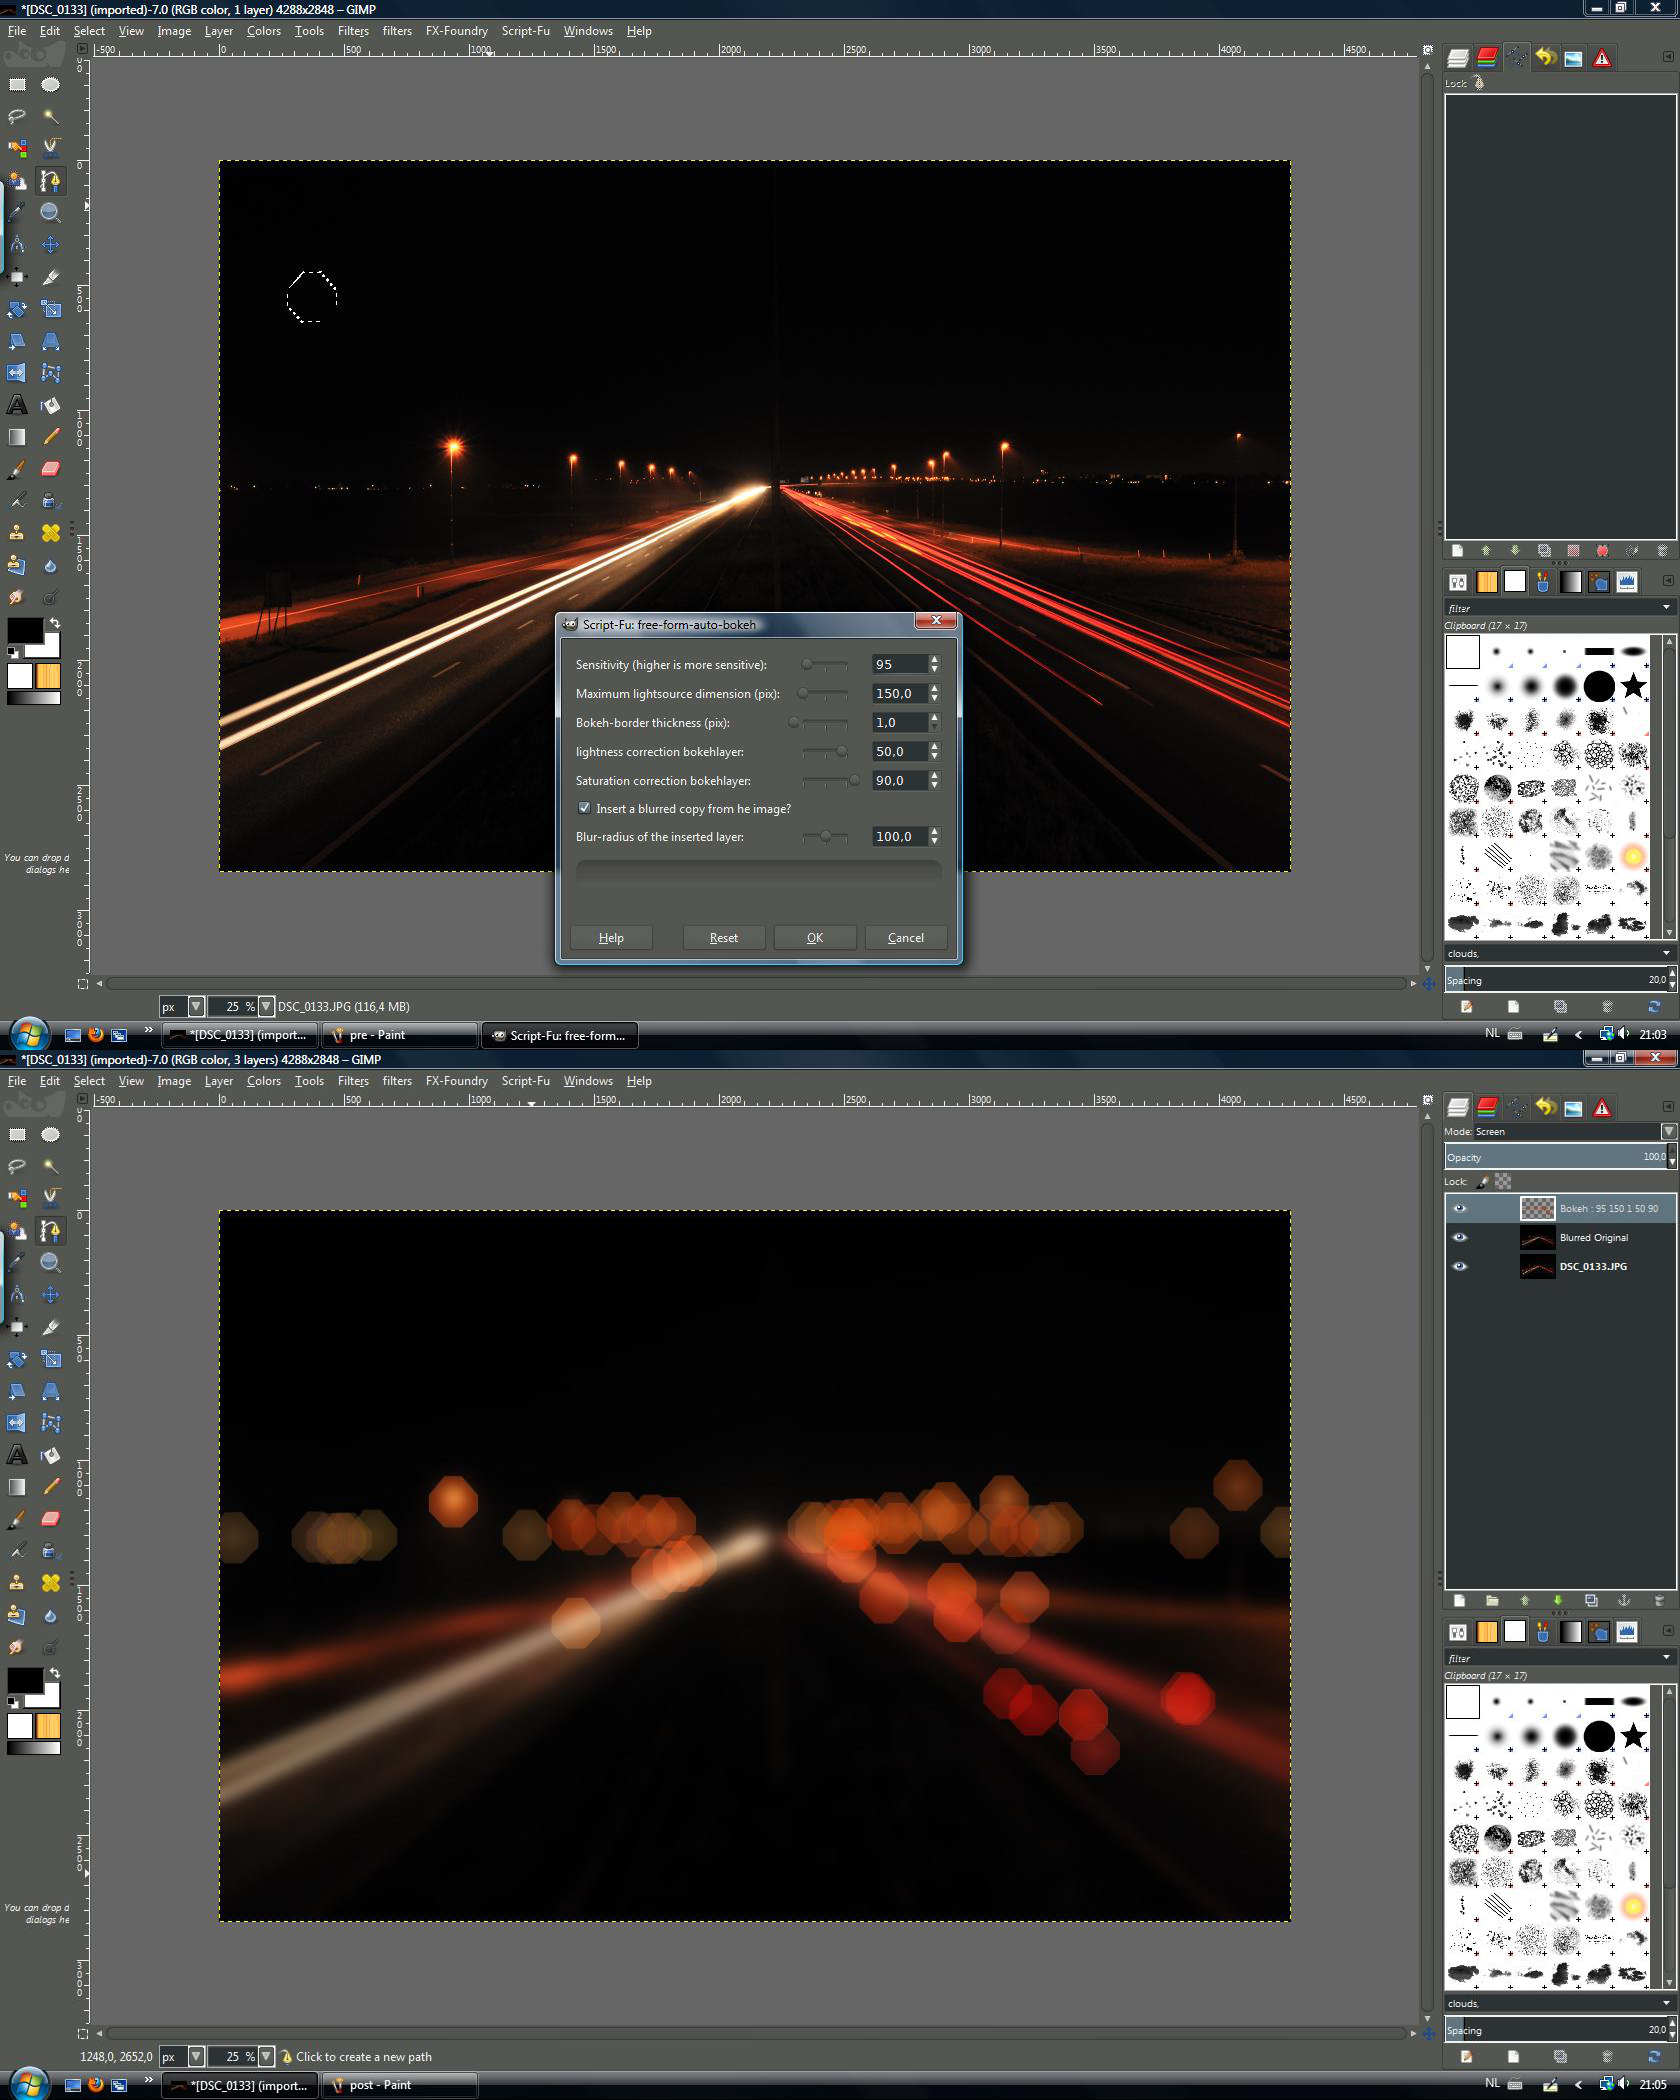
More on the free-form-auto-bokeh.
This plug-in finds the brightest light-sources in the image and uses the colour and
brightness of these light-sources to produce the bokeh's.
Depth in the image is simulated by making smaller light-sources produce a bokeh with a lower opacity.
Input-parameters are the sensitivity and the maximum size of the light-source.
The sensitivity determines how bright a light-source must be to produce a bokeh.
If there are very small light-sources in an overall dark image from which you want to produce
bokeh, set the sensitivity high.
The size-parameter determines the maximum size of the light-source that will
produce a bokeh, light-sources larger than the set value will be ignored.
This is used to prevent large lighted areas producing bokeh's.
You will have to try these parameters out for yourself, every image will need different parameters.
Please have a look at the example-images for some parameter settings.
If you can not get the desired results, please try the free-form-semi-auto-bokeh plug-in, which will allow free you to determine which light-sources will be used to produce the bokeh's.
Example images produced with this plug-in can be found in the accompanying files.
(Bridge Auto Bokeh, Harbour Auto Bokeh, Highway Auto Bokeh and Christmas Tree Auto Bokeh)
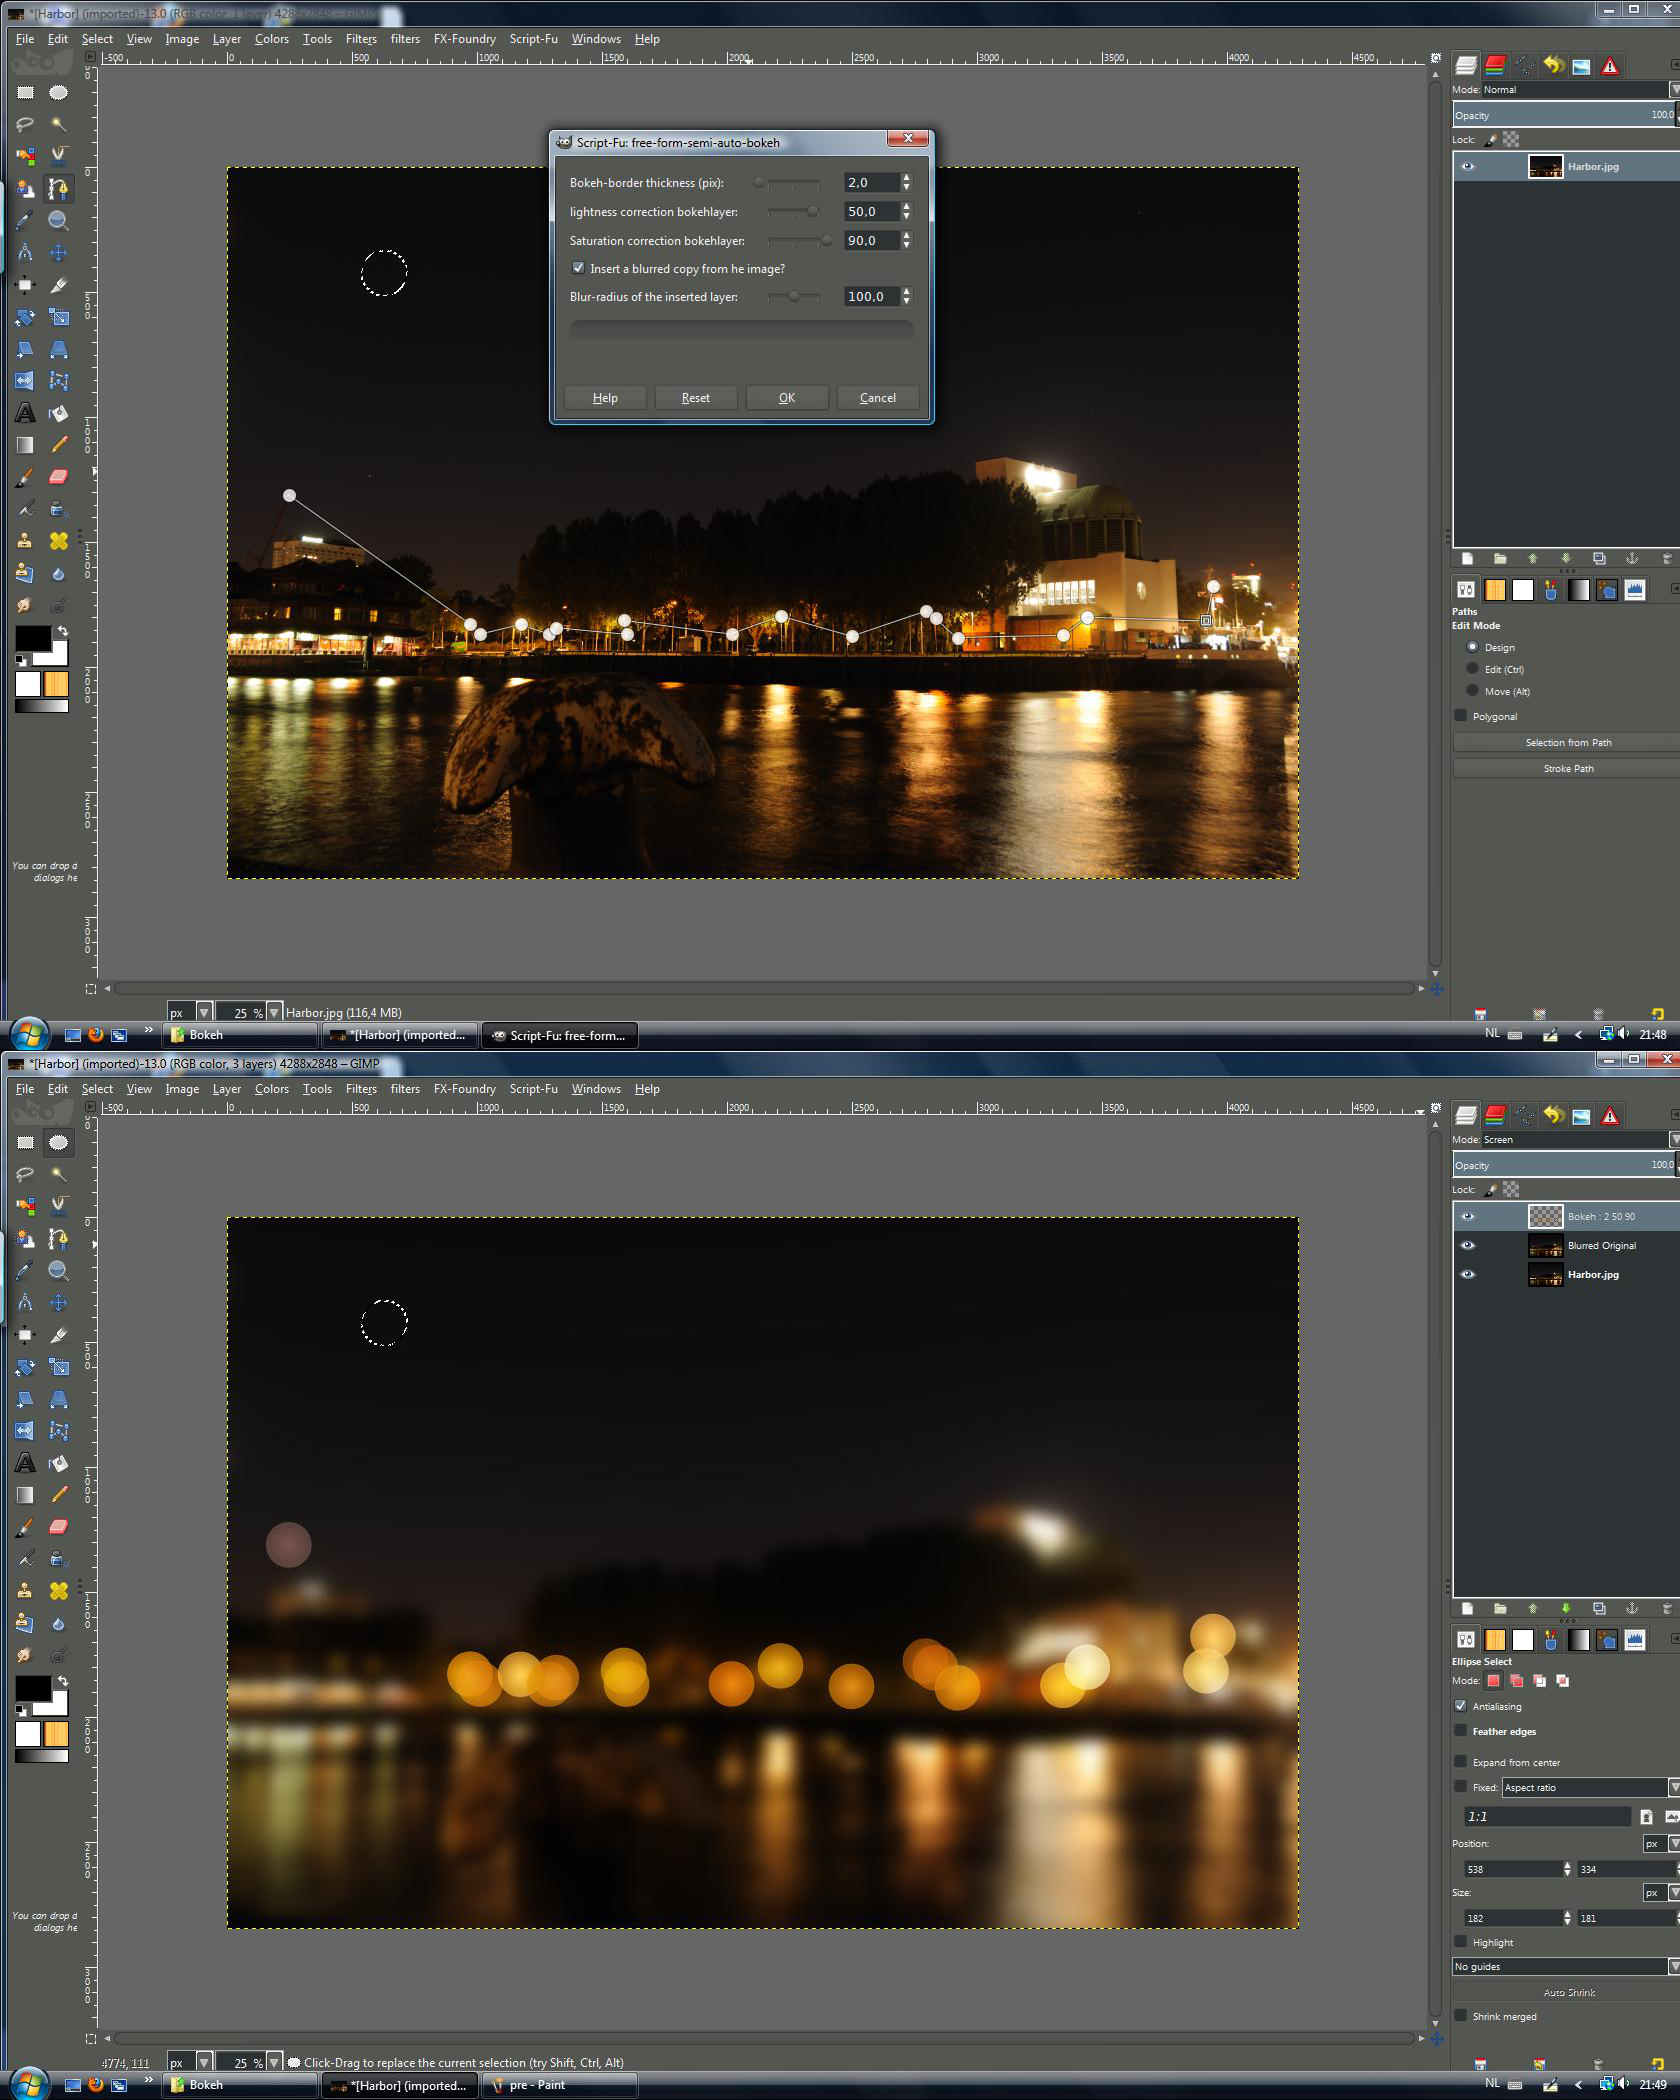
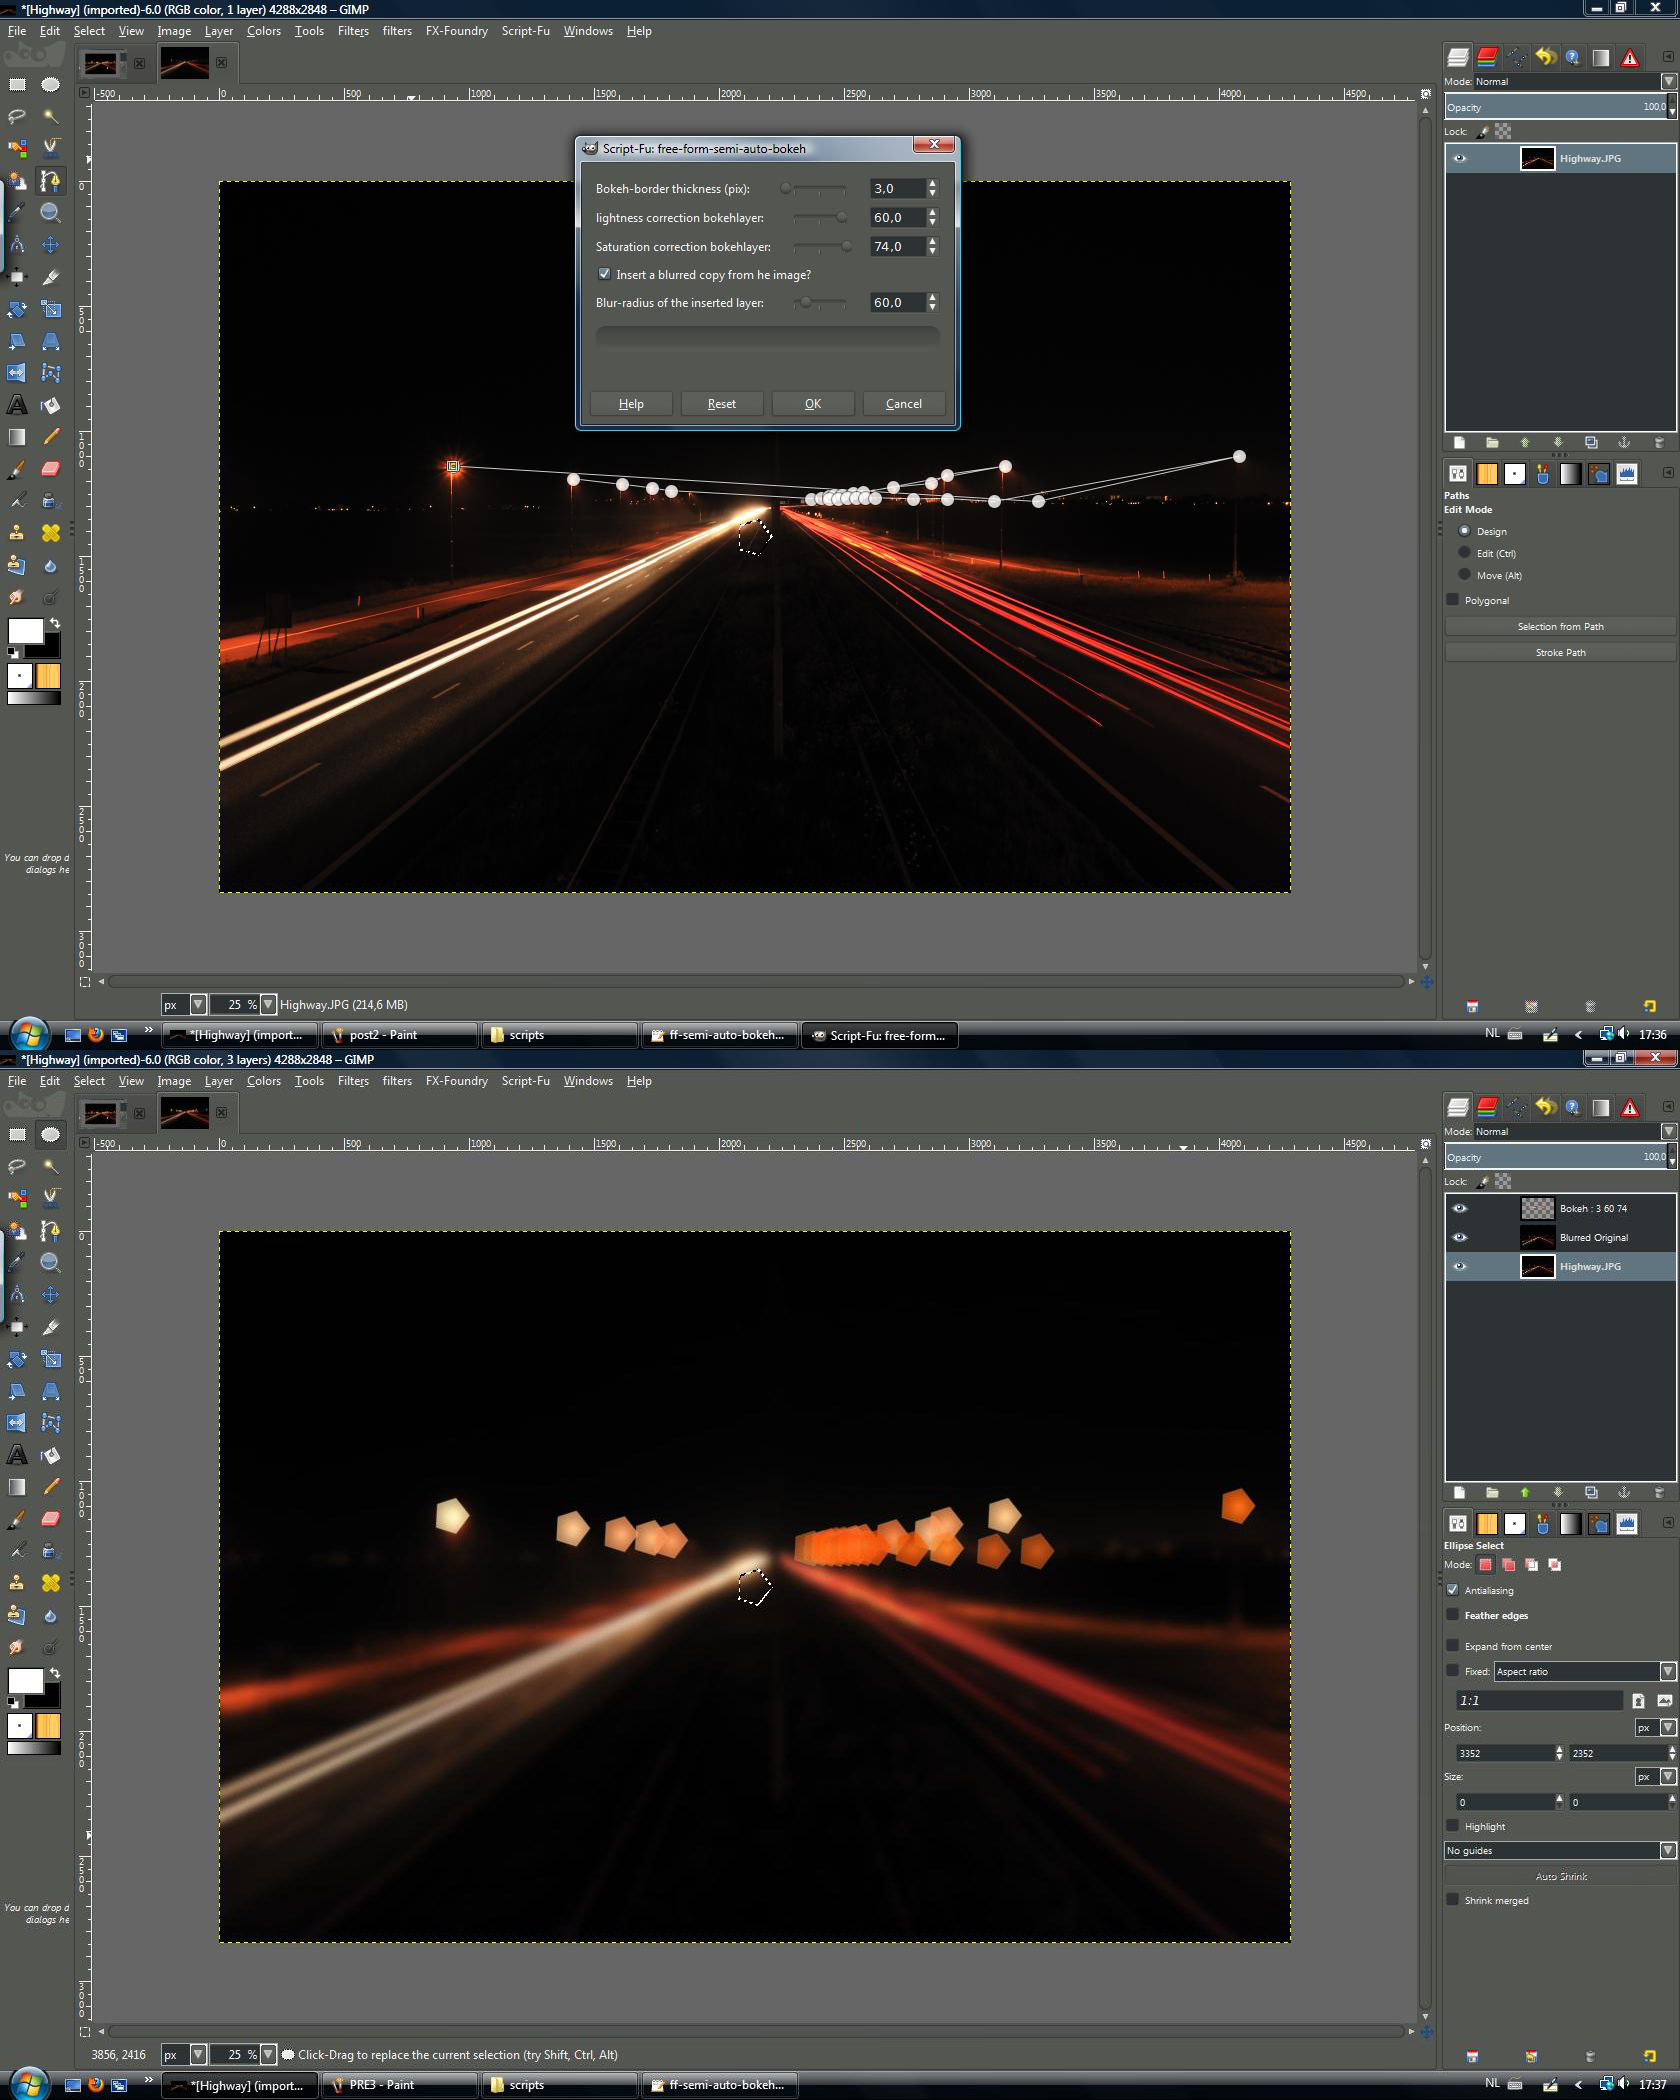
More on the free-form-semi-auto-bokeh.
In this plug-in the user must mark the light-sources he or she wants to produce a
bokeh's from.
This is done with the path-tool, in which the nodes must be placed on the chosen
light-sources. The path between nodes and the order of the nodes is irrelevant.
Because the colour of the produce bokeh depends on the colour in the image beneath
these nodes, care should be take in placing these nodes. Enlarge the image during placement of the nodes for better results.
Depth is NOT simulated, and the bokeh's tend to be more saturated then with the auto-bokeh plug-in.
This plug-in leaves the nodes on top of the pathstack and it preserves the original selection.
This is done so you can repeat the process with different lightness/saturation or a
different path without destroying your bokeh-selection. This is especially handy if
your bokeh-selection is more than just a circle.
You could use undo to get you're selection back, but that also removes the produced layer.
So be aware that the selection is left active!
If you entered the plug-in with the path-tool active, deselect this tool on exit to better view the result.
Example images produced with this plug-in can be found in the accompanying files.
(Harbour Semi Auto Bokeh and Highway Semi Auto Bokeh)
The plug-ins can be found under the menu “Filters/Bokeh”
Some Tips and Tricks
If, while using the auto-bokeh-plug-in, you get bokeh's in unwanted places, for instance
light reflections in water (see auto-bokeh Harbor picture), the following procedure will help.
-double the image-layer
-darken the areas where the unwanted bokeh's form
-run the plug-in but disable extra blurred layer
-delete layer with darkened areas
-double original image-layer and blur the extra layer as much as you would in the plug-in.
You can simulate more depth in your bokeh-effect if you use the semi-auto plug-in.
Mark the weakest light-sources and run the plug-in. This is the background layer.
Then mark the brighter light-sources, run the plug-in, this is the “nearer”-layer.
Repeat as many times as you need and process each bokeh-layer with for instance the blur-tool
to simulate depth.
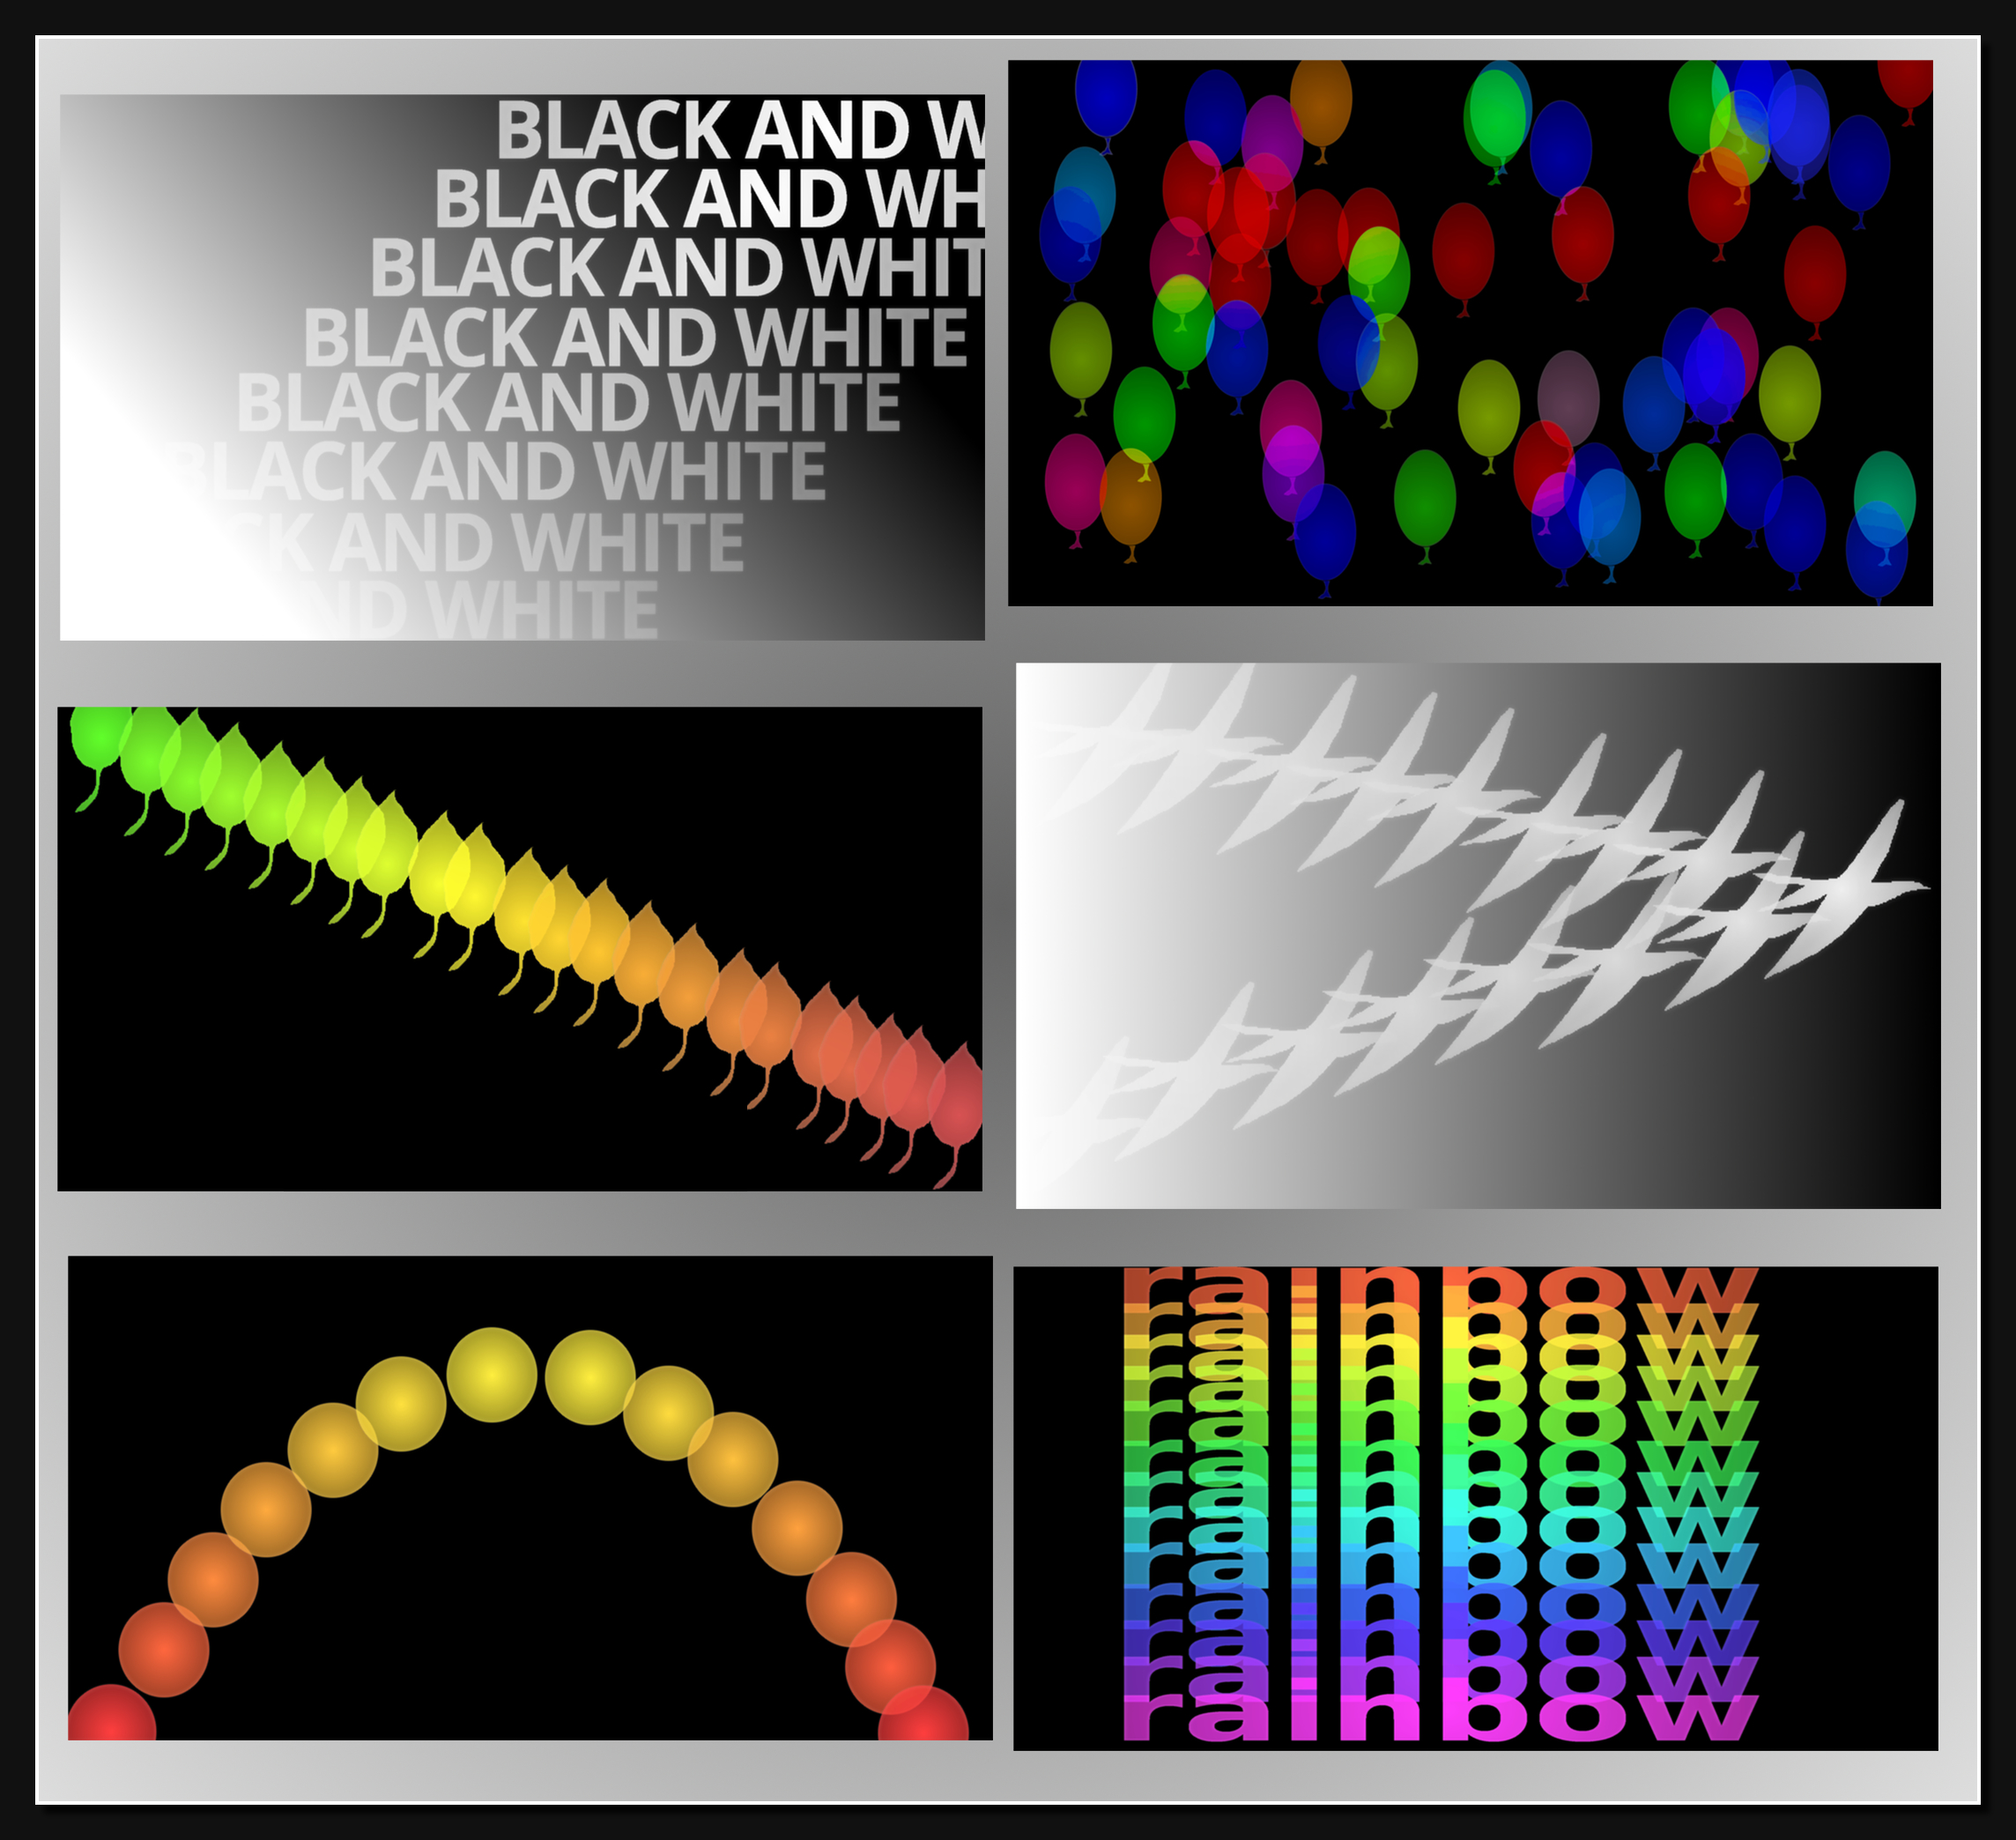
Finally, the active layer does not need to be a 'real world'-image.
The auto-bokeh plug-in needs bright spots in the image to work with, what they are or how they got there is irrelevant. You could for instance splatter some bright coloured dots on a black background,
make a selection and use the auto-bokeh plug-in.
The semi-auto-plug-in is even easier, just mark spots in the image with a reasonable brightness.
You could for instance create a coloured gradient and place nodes in it, make a selection, and you're off.
Please see the included image “Bokeh fun” in which both techniques are used.
Remember, for both plug-ins the selection can have any size and shape!
All the example-images are unedited outputs from these plug-ins.
For those how want to study the script, it is heavily commented.
Best viewed with gedit, tab set at 4 spaces.
Finaly I would like to thank all those people who upload their scripts, freely for
everyone to read, for their contribution, without them I would be at a loss.
Enjoy!
| Attachment | Size |
|---|---|
| 1.54 MB | |
| 1.22 MB | |
| 1.12 MB | |
| 1.15 MB | |
| 1.13 MB | |
| 1.07 MB | |
| 1.02 MB | |
| 21.23 KB |
Recent comments